Building asynchronous tweet scheduling app with Next.js, trigger.dev v3, X API and OpenAI
Trigger.dev released the new, v3 version recently, making creating asynchronous workflows even simpler in their cloud architecture with NodeJS. In this article, we are going to build a simple application and explore the capabilities of the new trigger.dev version.
But what is an asynchronous workflow and why is it useful? Usually, even in smaller applications, certain events or tasks should happen asynchronously. There are several reasons to do so,
- Application responsiveness: unresponsive UI makes the user experience terrible. There could be actions that should be initialized by the client and take a significant amount of time to proceed. Asynchronous workflows can take the heavy lifting and make the main application responsive during the time-consuming processing.
- Fault tolerance: with asynchronous workflows, if one component of the application fails, the main part of the application can still operate. Also, retries can help to rerun the failed components unaffected by the main part of the application.
- Scalability: asynchronous workflows can reduce the load of the main application, especially in cases when a workflow task performs resource-intensive calculations.
- Separation of Concerns: The main application can focus on handling user interactions and requests, while the asynchronous workflows handle the processing of background tasks, such as sending emails, generating reports, or updating data.
Project setup
We are going to build a social media post scheduler application with some flavor of AI to drive the hype around it. The user can schedule social media posts which are delivered by trigger.dev and contain a short description about the given topic, generated by OpenAI.
I want to emphasize that creating an original and creative social media profile should not built on fully generated social media posts, so I don't recommend using such applications in real life but it is a fun exercise to experience new tools.
You can find the source code published on GitHub.
Next.js project
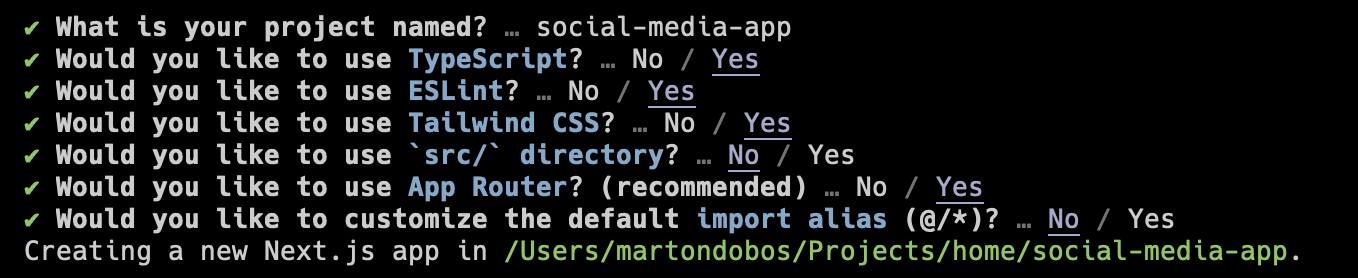
Starting a new Next.js project is super simple, you need one command that creates everything you need for the start.
npx create-next-app@latestI use the following customization options during the installation process.
You can start the app with
cd social-media-app && npm run devTrigger.dev
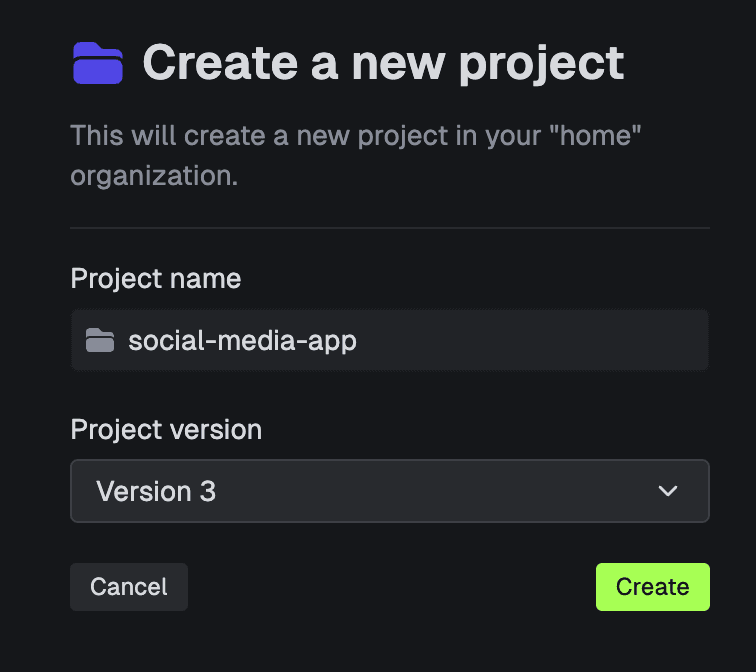
Trigger.dev v3 is in Developer preview at this point, you need to sign up and request access. If you have the access, create a new project. Make sure you select Version 3 from the project version dropdown.
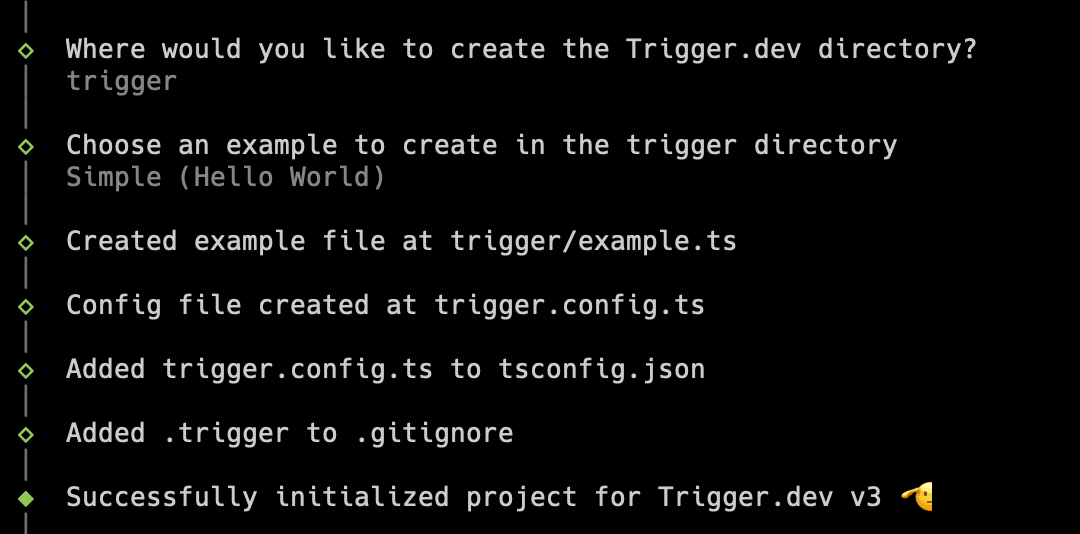
After successfully creating the first trigger.dev project, you can easily set it up with the command you see on your screen.
npx trigger.dev@beta init -p proj_***You can start with the simple example to try out the connection, we will delete it later anyway.
Trigger.dev has an easy solution to test your tasks from your local machine with the following command. Important to note that if you use your app locally, you have to start trigger.dev locally as well. This will allow you to schedule tasks in development mode.
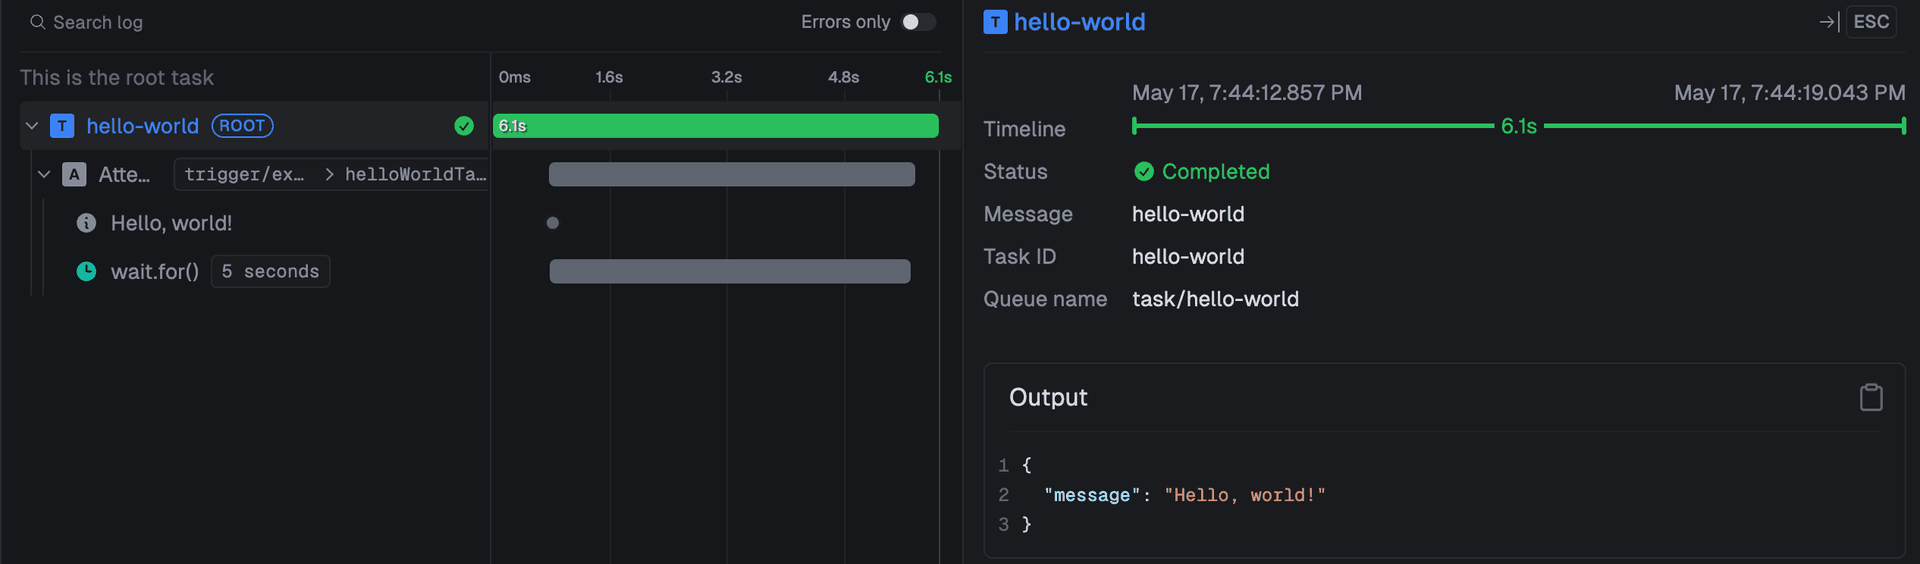
npx trigger.dev@beta devAfter the successful initialization, navigate to the Test menu and test your very first trigger.dev task.
Ideally, you don't want to expose your tokens and keys, even if you use a private repository, so you should always use environment variables or secrets for storing secrets. Next.js has a built-in solution for environment variables, you need a .env.local file with the keys and tokens. In your local environment, it will be injected automatically into the process.env.XY variable.
# .env.local

TRIGGER_SECRET_KEY=***
Data Storage
Trigger.dev provides a platform and toolset to schedule tasks and run scheduled tasks at the right time. However, it does not have a direct interface to pass payload information to the scheduled job. In our case, we need a storage layer to store payload information about the tweet we scheduled, for example, the keywords that we want to use in the tweet. The tweet text will be generated from the keywords. If you want to schedule tweets with written text, you should store the tweet text message instead.
For our simple case, we use an Upstash Redis store to save this information. You can easily register with GitHub and create a new Redis Database for free. For integrating the database into our application, we use the @upstash/redis package.
npm install @upstash/redisAfter creating the Upstash Account, add the Redis URL and key to the .env.local file
# .env.local

...
REDIS_REST_URL=***
REDIS_REST_TOKEN=***
Other packages
There are some other packages that we use in our application. Usually, these are important packages that are not necessarily connected to only one feature but we use it across the application.
Jest
This is a tutorial article, so we won't have production-ready unit test coverage, but there are some places in our app, that are worth testing with unit tests. You can follow the Jest setup guide on the Next.js site.
npm install --save-dev jest jest-environment-jsdom ts-node @types/jest
npm init jest@latestimport nextJest from "next/jest.js";
import type { Config } from "jest";
const createJestConfig = nextJest({
// Provide the path to your Next.js app to load next.config.js and .env files in your test environment
dir: "./",
});
// Add any custom config to be passed to Jest
const config: Config = {
coverageProvider: "v8",
testEnvironment: "jsdom",
// Add more setup options before each test is run
// setupFilesAfterEnv: ['<rootDir>/jest.setup.ts'],
};
// createJestConfig is exported this way to ensure that next/jest can load the Next.js config which is async
export default createJestConfig(config);Zod
Zod is a TypeScript-first schema declaration and validation library. We use Zod for validating JavaScript variables. Even if you use TypeScript in your project, it gives you type safety only in development time, not in runtime. Without runtime schema validation, you can not be sure an object in the application has the same shape as the type says.
npm install zod zod-form-dataShadcn/ui
Shadcn/ui is a beautifully designed clean component library that you can copy and paste into your apps. We use the components and layouts to build a basic UI for our scheduler app.
npx shadcn-ui@latest init
Simple-icons
Simple-icons is a collection of brand icons. We use it mostly for the X icon in our frontend application.
Features
In this section, we overview the features of our application. At first, we integrate the X SDK in our app, then we proceed with the X authentication, scheduling tweets, and finally, generating tweet text with OpenAI SDK.
X (Twitter) API integration
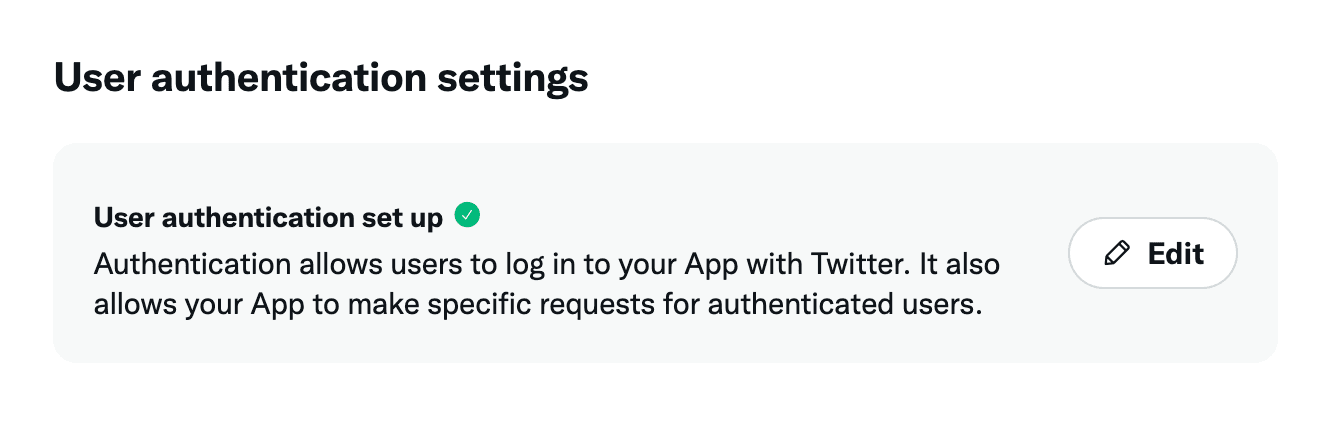
For X API integration we use the official X TypeScript SDK which provides a wrapper around the API and makes the integration easier. Before we can start using the SDK, we need to register to X Developer Portal and create a new project. The next step after creating the project is to navigate to the App Settings and configure the user authentication parameters.
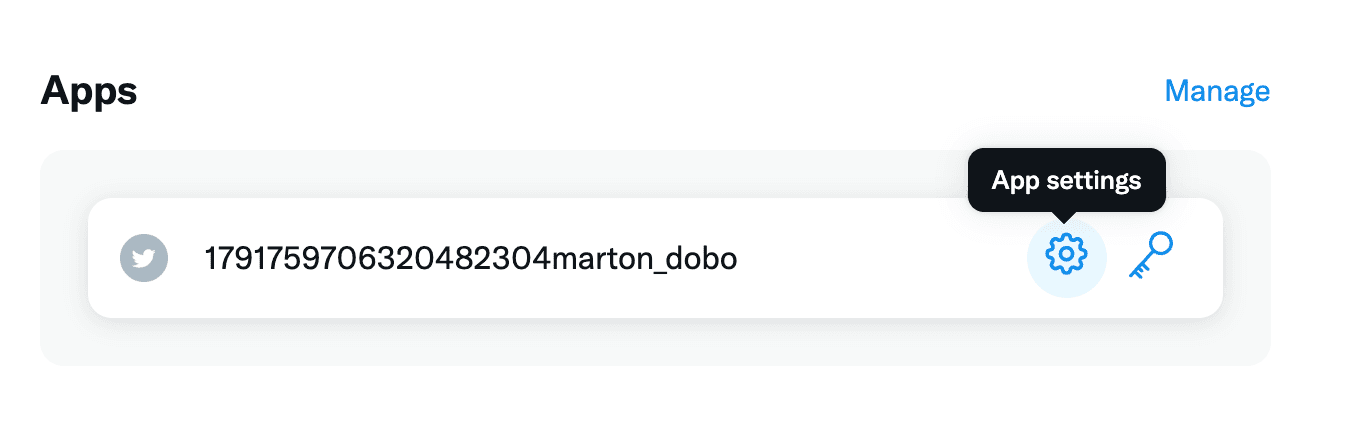
Use the following settings options
- Read and write App permission
- Web App type
- App Info callback: http://127.0.0.1:3000/callback
- I used my own X profile as the Website URL, in case you deploy the app somewhere, you can use the real website URL.
On the Keys and Tokens tab, you can find the OAuth 2.0 Client ID and Client Secret, let’s copy the values and use them as environment variables.
# .env.local
...
TWITTER_CLIENT_ID=***
TWITTER_CLIENT_SECRET=***
TWITTER_STATE_STRING=twitter_state_string
TWITTER_CODE_CHALLENGE=twitter_code_challenge
Now we can start the coding part by installing the necessary npm package.
npm install twitter-api-sdkTwitter API is one of the core tools of our application. The user can sign in with an X account and can schedule tweets on the account's behalf. X has an official authentication guide that we implement.
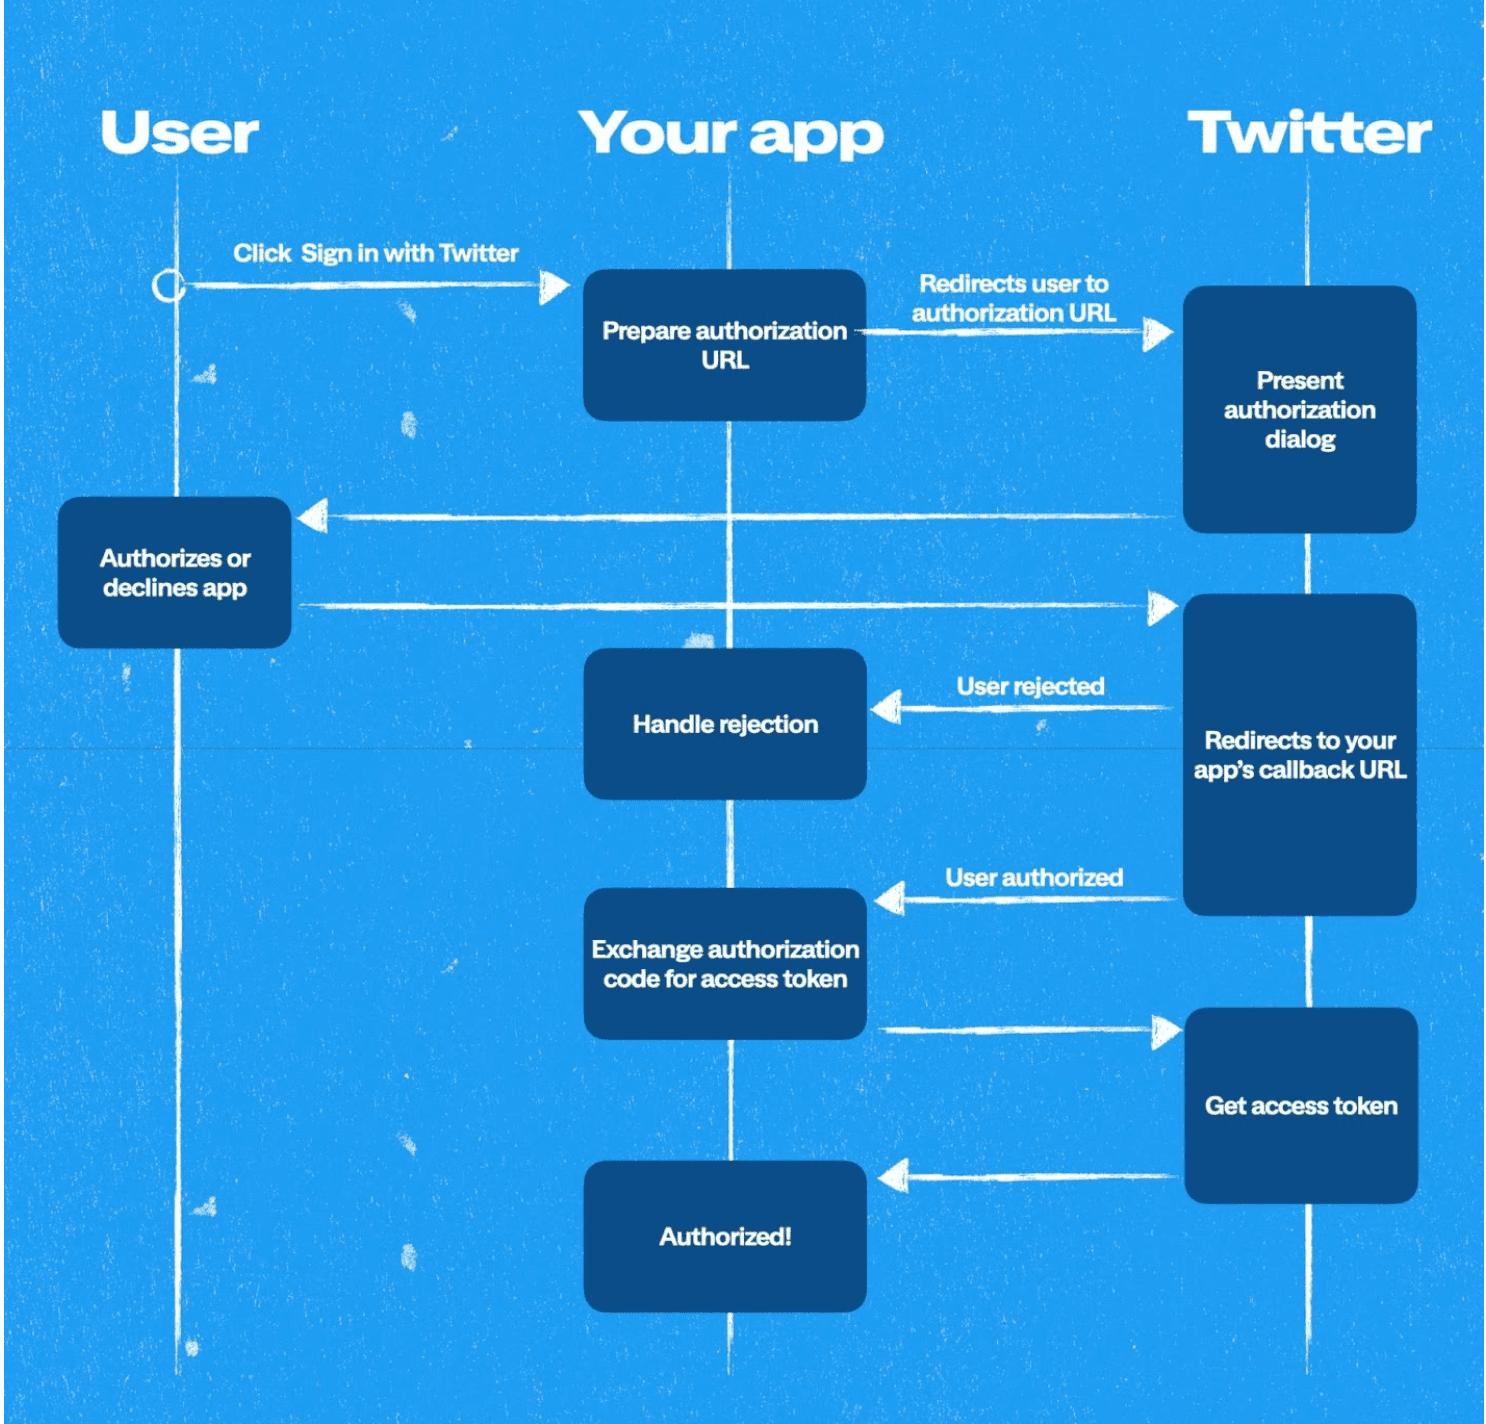
We use a http-only cookie for storing the token, so we can implement stateless authentication with simple functions. The Twitter client has an optional token property to add the user token to the Twitter API requests.
There is a workaround, that you should notice here. In the requestAccessToken method, we call the generateAuthURL because the Twitter client needs a URL initialization on the callback route.
"use server";

import { cookies } from "next/headers";
import { redirect } from "next/navigation";
import { auth, Client } from "twitter-api-sdk";
import { OAuth2UserOptions } from "twitter-api-sdk/dist/OAuth2User";

const getTwitterClients = (token?: OAuth2UserOptions["token"]) => {
  const authClient = new auth.OAuth2User({
    client_id: process.env.TWITTER_CLIENT_ID ?? "",
    client_secret: process.env.TWITTER_CLIENT_SECRET ?? "",
    callback: "http://127.0.0.1:3000/callback",
    scopes: ["tweet.write", "users.read", "tweet.read", "offline.access"],
    token,
  });

  const client = new Client(authClient);

  return { authClient, client };
};

/**
 * Retrieves the Twitter token from the cookies.
 * @returns The Twitter token if it exists, otherwise undefined.
 */
const getTwitterTokenFromCookies = (): OAuth2UserOptions["token"] | undefined => {
  const savedToken = cookies().get("token");
  return savedToken ? JSON.parse(savedToken.value) : undefined;
};

/**
 * Generates the authentication URL for Twitter.
 * @param authClient - The OAuth2User object used for authentication.
 * @returns The authentication URL.
 */
const generateAuthURL = (authClient: auth.OAuth2User) => {
  return authClient.generateAuthURL({
    state: process.env.TWITTER_STATE_STRING ?? "",
    code_challenge_method: "plain",
    code_challenge: process.env.TWITTER_CODE_CHALLENGE ?? "",
  });
};

/**
 * Logs in the user by generating an authentication URL and redirecting to it.
 * @returns {Promise<void>} A promise that resolves once the user is redirected.
 * @throws {Error} An error is thrown if the authentication URL cannot be generated.
 */
export const login = async (): Promise<void> => {
  const token = getTwitterTokenFromCookies();
  const { authClient } = getTwitterClients(token);
  const url = generateAuthURL(authClient);

  if (url) {
    redirect(url);
  }
};

/**
 * Requests an access token from Twitter API.
 * @param code - The authorization code received from Twitter.
 * @param state - The state parameter received from Twitter.
 * @returns A Promise that resolves to the access token.
 * @throws An error if the state parameter doesn't match the expected value.
 */
export const requestAccessToken = async (code: string, state: string) => {
  if (state !== process.env.TWITTER_STATE_STRING) {
    throw new Error("State isn't matching!");
  }

  const token = getTwitterTokenFromCookies();
  const { authClient } = getTwitterClients(token);

  generateAuthURL(authClient);

  return authClient.requestAccessToken(code);
};

/**
 * Refreshes the access token for Twitter authentication.
 *
 * @param token - The OAuth2 user token.
 * @returns A promise that resolves to the refreshed access token.
 */
export const refreshToken = async (token?: OAuth2UserOptions["token"]) => {
  const { authClient } = getTwitterClients(token);
  return authClient.refreshAccessToken();
};

/**
 * Logs out the user from Twitter by revoking the access token and deleting the token from cookies.
 */
export const logout = async () => {
  const token = getTwitterTokenFromCookies();
  const { authClient } = getTwitterClients(token);
  await authClient.revokeAccessToken();
  cookies().delete("token");
  redirect("/");
};
Using the use server directive ensures the functions defined in this file are allowed to be used only on the server side, these functions are called server actions. This can prevent us from accidentally exposing our auth token.
Authentication with X
Now we have the backend integration of the X login, let’s build a simple frontend to try how it works. The layout file is very simple, we remove almost everything from it.
import type { Metadata } from "next";

import "./globals.css";

export const metadata: Metadata = {
  title: "Awesome Tweet Generator App",
  description: "Generate awesome tweets with this app",
};

export default function RootLayout({
  children,
}: Readonly<{
  children: React.ReactNode;
}>) {
  return (
    <html lang="en">
      <body>{children}</body>
    </html>
  );
}
The page contains a simple UI with an X login button.
import { siX } from "simple-icons";
import { cn } from "@/lib/utils";
import { TwitterLogin } from "@/components/twitter";
export default function Home() {
return (
<main className="container relative hidden h-[800px] flex-col items-center justify-center md:grid lg:max-w-none lg:grid-cols-2 lg:px-0">
<div className="relative hidden h-full flex-col bg-muted p-10 text-white dark:border-r lg:flex">
<div className="absolute inset-0 bg-zinc-900" />
<div className="relative z-20 flex items-center text-lg font-medium">
<svg
role="img"
viewBox="0 0 24 24"
className="mr-2 h-4 w-4"
fill="currentColor"
xmlns="http://www.w3.org/2000/svg"
>
<path d={siX.path}></path>
</svg>
Awesome Tweet Scheduler
</div>
<div className="relative z-20 mt-auto">
<blockquote className="space-y-2">
<p className="text-lg">
“This is an awesome, easy to use tool to schedule tweets regularly, simply love it!”
</p>
<footer className="text-sm">John Doe</footer>
</blockquote>
</div>
</div>
<div className="lg:p-8">
<div className="mx-auto flex w-full flex-col justify-center space-y-6 sm:w-[350px]">
<div className="flex flex-col space-y-2 text-center">
<h1 className="text-2xl font-semibold tracking-tight">Login with your account</h1>
<p className="text-sm text-muted-foreground">Connect you X profile and start scheduling</p>
</div>
<div className={cn("grid gap-6")}>
<TwitterLogin />
</div>
</div>
</div>
</main>
);
}The Twitter login component is a separate, simple component. The interesting part is the from action that we use here. Server action is a relatively new React feature that we can use with Next.js. It ensures the function will be executed only on the server side, so you can use database operations, or server-only codes in this function. In our case, it makes the code simpler, because we don't need to create API routes for the login but we can use the server function directly from here.
npx shadcn-ui@latest add buttonimport { siX } from "simple-icons";
import * as twitter from "@/lib/twitter";
import { Button } from "@/components/ui/button";
export const TwitterLogin = () => {
return (
<form action={twitter.login}>
<Button variant="default" type="submit" className="w-full">
Login with
<svg
role="img"
viewBox="0 0 24 24"
className="ml-2 h-4 w-4"
fill="currentColor"
xmlns="http://www.w3.org/2000/svg"
>
<path d={siX.path}></path>
</svg>
</Button>
</form>
);
};Twitter login redirect the user to a callback route that you can configure on the X Developer portal. If you followed the instructions above, the route is the /callback path. Let's define the functionality of this route. It parses the redirect URL, then requests an access token for the visitor, and finally, saves the token to http-only cooke. Next.js header lib provides useful and simple functions to operate with the cookies. After having the access token and saving it successfully to a cookie, we redirect the user to the dashboard page.
import { cookies } from "next/headers";
import { redirect } from "next/navigation";
import { NextRequest, NextResponse } from "next/server";

import * as twitter from "@/lib/twitter";

export const GET = async (request: NextRequest, res: NextResponse) => {
  const { searchParams } = new URL(request.url);
  const state = searchParams.get("state");
  const code = searchParams.get("code");

  if (!state || !code) {
    return Response.json({ error: "Invalid code" }, { status: 400 });
  }

  const token = await twitter.requestAccessToken(code, state);

  cookies().set("token", JSON.stringify(token.token), {
    httpOnly: true,
    secure: true,
  });

  return redirect("/dashboard");
};
At this point the dashboard page is a very simple component, we will add the scheduling function UI components later.
import { TwitterLogout } from "@/components/twitter";

export default function Dashboard() {
  return (
    <main className="flex min-h-screen flex-col items-start gap-6 p-24">
      <TwitterLogout />
    </main>
  );
}
And the logout component is similar to the Twitter Login component. Notice the React server action here as well.
import * as twitter from "@/lib/twitter";
import { Button } from "@/components/ui/button";

export const TwitterLogout = () => {
  return (
    <form action={twitter.logout}>
      <Button variant="outline" type="submit">
        Logout
      </Button>
    </form>
  );
};
Twitter actions
Now, extend the twitter.ts file with two new actions to get the user ID and create a new tweet. The ID is used for saving tweet details, tweet history, and tokens in Redis.
...

/**
 * Retrieves the current user's ID from Twitter API using the provided token.
 * @param token - The OAuth2 token for authentication.
 * @returns The current user's ID.
 * @throws If there are errors returned from the API or if the user ID is not found.
 */
export const getCurrentUserId = async (token: OAuth2UserOptions["token"]) => {
  const { client } = getTwitterClients(token);

  const res = await client.users.findMyUser();

  if (res.errors) {
    throw new Error(res.errors.map((error) => error.detail).join(", "));
  }

  if (!res.data?.id) {
    throw new Error("User ID not found");
  }

  return res.data.id;
};

/**
 * Creates a new tweet using the provided token and text.
 * @param token - The OAuth2 user token.
 * @param text - The content of the tweet.
 * @returns A Promise that resolves to the created tweet.
 */
export const createTweet = async (token: OAuth2UserOptions["token"], text: string) => {
  const { client } = getTwitterClients(token);
  return client.tweets.createTweet({ text });
};
Storing schedule information
Let's create a new folder and file of our lib folder, called redis/client.ts to define our Redis client and Redis functions. If you build a complex, production-ready app, it may be a good idea to create an abstract data layer and hide the exact database provider from the other parts of the application but in our simple case, it is not necessary. We can assume that we never change Redis to another database provider.
"use server";

import { Redis } from "@upstash/redis";

export const client = new Redis({
  url: process.env.REDIS_REST_URL ?? "",
  token: process.env.REDIS_REST_TOKEN ?? "",
});
For the environment variables, copy your endpoint and password from the Upstash Redis dashboard. The URL is not sensitive information but you can have different URLs in different environments, so it is worth to store as an environment variable.

Let’s talk about schema. Redis is a simple key-value storage, so it does not have any schema validation when you insert something by default. It makes Redis versatile but also fragile because if your app can not make sure the value has the type that it wants to use. To make the Redis operations safer, we use Zod schema and validation on Redis values.
Trigger.dev provides limited options to store information on schedules, so we use Redis to store the details of a schedule and we store only an ID on the trigger.dev schedule that can help us connect the data in the Redis store with the actual schedule.
At first, our very simple keyword schema, which contains string values, like tech,ai,interesting,hype for the generation.
And also, we want to save our last five tweets for the given keywords, to give some context to the tweet generation. We don't want to generate very similar tweets to our last five tweets on the given topic, or it can refer to one of our previous tweets.
import { z } from "zod";

// Key: "tweet:{userId}"
export const tweetSchema = z.object({
  keywords: z.array(z.string()),
});

// Key: "tweet-history:{userId}"
export const tweetHistorySchema = z
  .array(
    z.object({
      userId: z.string(),
      text: z.string(),
      createdAt: z.string(),
    })
  )
  .nullable()
  .optional();

export type Tweet = z.infer<typeof tweetSchema>;
export type TweetHistory = z.infer<typeof tweetHistorySchema>;
Now extend our client file with a few helper functions. In the functions use Zod schema parse functions, which throws an error if the given value does not match the schema.
...

/**
 * Adds a tweet to Redis with the given tweet ID and keywords.
 * @param userId - The ID of the twitter user.
 * @param keywords - An array of keywords associated with the tweet.
 * @returns A Promise that resolves when the tweet is successfully added to Redis.
 */
export const addTweet = async (userId: string, keywords: string[]) => {
  return client.set(`tweet:${userId}`, JSON.stringify({ keywords }));
};

/**
 * Retrieves a tweet from Redis based on the provided tweet ID.
 * @param userId - The ID of the twitter user to retrieve.
 * @returns A Promise that resolves to the retrieved tweet.
 */
export const getTweet = async (userId: string): Promise<Tweet> => {
  const tweet = await client.get(`tweet:${userId}`);
  return tweetSchema.parse(tweet);
};

/**
 * Adds a tweet to the tweet history list.
 * If the list already has 5 items, the oldest item is removed.
 * @param userId - The ID of the twitter user.
 * @param text - The text content of the tweet.
 * @returns A Promise that resolves to the result of the set operation.
 */
export const addTweetHistory = async (userId: string, text: string) => {
  const historyList = await getTweetHistory(userId);
  let newHistoryList: TweetHistory = [];
  if (historyList && historyList.length === 5) {
    const [, ...rest] = historyList;
    newHistoryList.push(...rest);
  }
  newHistoryList.push({ userId, text, createdAt: new Date().toISOString() });

  return client.set(`tweet-history:${userId}`, JSON.stringify(newHistoryList));
};

/**
 * Retrieves the tweet history for a given user.
 * @param userId - The ID of the user.
 * @returns A Promise that resolves to the tweet history for the user.
 */
export const getTweetHistory = async (userId: string): Promise<TweetHistory> => {
  const tweetHistory = await client.get(`tweet-history:${userId}`);
  const history = tweetHistorySchema.parse(tweetHistory);

	// Sort the history by createdAt date in descending order
  // to get the latest tweet first
  return history?.sort((a, b) => new Date(b.createdAt).getTime() - new Date(a.createdAt).getTime());
};
Scheduling tweets
For scheduling we use the installed trigger.dev SDK. If you followed the instructions above, you already have a trigger folder with an example task in your project structure. Every task, that you want to run with trigger.dev, should placed in this folder to trigger.dev sync these automatically. You just need to start trigger.dev locally and after the automatic sync, the tasks are available on the platform.
So, let’s create a new scheduled task. For now, we use a placeholder for the tweet text, and later in the article, we will update this part with the OpenAI text generation.
Handling the input parameters
For validating and transforming the input values to cron, we use Zod schema. As an input we get a time string in "HH:mm" format, frequency, and an optional weekday property, that marks the day of the week if we have weekly frequency. As a result of the schema transform, we get a cron string, that we can use to schedule the task.
import { z } from "zod";

export const scheduleSchema = z
  .object({
    time: z
      .string()
      .regex(/^([0-1]?[0-9]|2[0-3]):[0-5][0-9]$/, "Invalid time format, expected HH:MM")
      .transform((value) => {
        const [hour, minute] = value.split(":");
        return { hour, minute };
      }),

    frequency: z.enum(["daily", "monday", "tuesday", "wednesday", "thursday", "friday", "saturday", "sunday"]),
    keywords: z.array(z.string({ message: "Please add keywords!" })),
  })
  .transform((value) => {
    if (value.frequency === "daily") {
      return { time: value.time, frequency: value.frequency, weekday: undefined };
    }
    return {
      time: value.time,
      frequency: value.frequency,
      weekday: ["monday", "tuesday", "wednesday", "thursday", "friday", "saturday", "sunday"].indexOf(value.frequency),
    };
  })
  .transform((value) => {
    if (value.frequency === "daily") {
      return `${value.time.minute} ${value.time.hour} * * *`;
    }
    return `${value.time.minute} ${value.time.hour} * * ${value.weekday + 1}`;
  });

export type ScheduleInput = z.input<typeof scheduleSchema>;
By using Zod transform, usually, the input type of the schema is different from the output. Zod has a tool to get input and output types based on the schema you describe. If you need the input type, use z.input as you can see in our example.
It is worth writing a unit test for such functionality to make sure that the cases are properly covered. We validate the behavior in case of valid and invalid input data with the test cases.
import { scheduleSchema } from "./cron";

describe("cronParamSchema", () => {
  it("should validate a daily cron parameter", () => {
    const validParam = {
      time: "12:30",
      frequency: "daily",
    };

    const result = scheduleSchema.safeParse(validParam);

    expect(result.success).toBe(true);
    expect(result.data).toEqual("30 12 * * *");
  });

  it("should validate a weekly cron parameter", () => {
    const validParam = {
      time: "09:00",
      frequency: "weekly",
      weekday: 3,
    };

    const result = scheduleSchema.safeParse(validParam);
    expect(result.success).toBe(true);
    expect(result.data).toEqual("00 09 * * 2");
  });

  it("should validate for an daily schedule with weekday param", () => {
    const invalidParam = {
      time: "08:45",
      frequency: "daily",
      weekday: 4,
    };

    const result = scheduleSchema.safeParse(invalidParam);
    expect(result.success).toBe(true);
    expect(result.data).toEqual("45 08 * * *");
  });

  it("should validate for an daily schedule with invalid weekday param", () => {
    const invalidParam = {
      time: "08:45",
      frequency: "daily",
      weekday: 12,
    };

    const result = scheduleSchema.safeParse(invalidParam);
    expect(result.success).toBe(true);
    expect(result.data).toEqual("45 08 * * *");
  });

  it("should fail validation for an weekly schedule without weekday param", () => {
    const invalidParam = {
      time: "08:45",
      frequency: "weekly",
      weekday: undefined,
    };

    const result = scheduleSchema.safeParse(invalidParam);
    expect(result.success).toBe(false);
    expect(result.error?.issues[0].message).toBe(
      "Weekday is required for weekly schedules and must be between 1 and 7"
    );
  });

  it("should fail validation for an invalid weekday", () => {
    const invalidParam = {
      time: "08:45",
      frequency: "weekly",
      weekday: 8,
    };

    const result = scheduleSchema.safeParse(invalidParam);
    expect(result.success).toBe(false);
    expect(result.error?.issues[0].message).toBe(
      "Weekday is required for weekly schedules and must be between 1 and 7"
    );
  });

  it("should fail validation for an invalid time format", () => {
    const invalidParam = {
      time: "12:00:00",
      frequency: "daily",
    };

    const result = scheduleSchema.safeParse(invalidParam);
    expect(result.success).toBe(false);
    expect(result.error?.issues[0].message).toBe("Invalid time format, expected HH:MM");
  });
});
Handling auth token
Earlier, we discussed the authentication. However, there's an issue. When a user logs in, we can use the generated token for immediate actions, but in our scenario, we don't execute actions immediately upon scheduling. Instead, we need the token later to publish a tweet. For simplicity, in this tutorial, we'll use Redis to store the user-connected token for later use.
/**
 * Adds a user token to Redis.
 * @param userId - The ID of the twitter user.
 * @param token - The user token to be added.
 * @returns A Promise that resolves when the token is successfully added.
 */
export const addUserToken = async (userId: string, token: string) => client.set(`token:${userId}`, token);

/**
 * Retrieves the user token associated with a tweet ID from Redis.
 * @param userId The ID of the twitter user.
 * @returns A Promise that resolves to the user token or null if not found.
 */
export const getUserToken = async (userId: string): Promise<OAuth2UserOptions["token"] | null> => {
  const token = await client.get<OAuth2UserOptions["token"]>(`token:${userId}`);
  return tokenSchema.parse(token);
};

/**
 * Deletes a token associated with a tweet ID.
 * @param userId The ID of the twitter user.
 * @returns A Promise that resolves to the number of deleted tokens.
 */
export const deleteToken = async (userId: string) => client.del(`token:${userId}`);

...
Scheduling Tweets
In the schedule function, we first validate the time input field and convert it into a valid cron string. If the input variable doesn't match the schema, the Zod parse method throws an error, and we don't create or schedule the tweet. If the validation succeeds, we save the tweet to the database and schedule the cron. Note, creating the tweet in the database and scheduling the task don't run in a transaction. If scheduling fails, the tweet won't be removed from the database. Making this process transactional is beyond the scope of this article, but for a production-ready application, it would be advisable to put effort into this area.
"use server";

import { cookies } from "next/headers";
import { scheduledTweetTask } from "@/trigger/scheduled-tweet";
import { schedules } from "@trigger.dev/sdk/v3";
import { OAuth2UserOptions } from "twitter-api-sdk/dist/OAuth2User";

import * as cron from "./cron";
import * as redisClient from "./redis/client";
import * as twitterLib from "./twitter";

export const scheduleTweet = async (props: cron.ScheduleInput) => {
  const transformedCron = cron.scheduleSchema.parse(props);

  const savedToken = cookies().get("token");
  const token: OAuth2UserOptions["token"] | undefined = savedToken ? JSON.parse(savedToken.value) : undefined;

  if (!token) {
    throw new Error("No token found in cookies");
  }

  const userId = await twitterLib.getCurrentUserId(token);

  await redisClient.addUserToken(userId, JSON.stringify(token));

  await redisClient.addTweet(userId, props.keywords);

  const createdSchedule = await schedules.create({
    task: scheduledTweetTask.id,
    cron: transformedCron,
    externalId: userId,
    //this makes it impossible to have two schedules for the same tweet
    deduplicationKey: `${userId}-${transformedCron}-tweet-schedule`,
  });

  return { id: createdSchedule.id, nextRun: createdSchedule.nextRun ?? null };
};
Finally, we'll create the trigger.dev scheduled task. In schedule.ts, we set the task id as the schedule's reference. This way, trigger.dev knows we want to schedule the scheduledTweetTask task when creating a new schedule.
This task includes a run function. It implements the discussed flow with a few extra steps. For instance, if the current token expires, we need to request a new one.
Note that simple console logs won't work in the trigger.dev environment. If you want to add logs to your tasks, trigger.dev has an official logger client for this purpose.
With trigger.dev, you have numerous options to customize and control your tasks' behavior. You can set retry logic, concurrency configuration, machine definitions, etc. Keep in mind that trigger.dev v3 is still in Developer Preview. Some features aren't implemented yet, but they will be soon.
import { logger, schedules } from "@trigger.dev/sdk/v3";
import { z } from "zod";

import * as redisClient from "@/lib/redis/client";
import * as twitterLib from "@/lib/twitter";

export const scheduledTweetTask = schedules.task({
  id: "scheduled-tweet-task",
  run: async (payload) => {
    try {
      if (!payload.externalId) {
        throw new Error("External ID is required!");
      }

      const token = await redisClient.getUserToken(payload.externalId);

      if (!token) {
        throw new Error("No token found for the user");
      }

      let latestToken = token;
      if (token.expires_at && new Date(token.expires_at) < new Date()) {
        const { token: refreshedToken } = await twitterLib.refreshToken(token);
        latestToken = refreshedToken;
      }

      const { keywords } = await redisClient.getTweet(payload.externalId);

      const tweetHistoryList = await redisClient.getTweetHistory(payload.externalId);

      // Generate a tweet based on the keywords
      const tweetText = `Hello there, ${keywords.join(" ")}!`;

      const response = await twitterLib.createTweet(latestToken, tweetText);

      if (response.errors) {
        throw new Error(response.errors.map((error) => error.detail).join(", "));
      }

      await redisClient.addTweetHistory(payload.externalId, tweetText);

      logger.info(`Tweet history added for tweet ID: ${payload.externalId}`);

      return response.data;
    } catch (error) {
      if (error instanceof z.ZodError) {
        logger.error(`Error in scheduledTweetTask: ${error.flatten()}`);
        throw error;
      }

      logger.error("Error in scheduledTweetTask", { error });
      throw error;
    }
  },
});
Building UI to schedule tweets
As the next step, we build a simple UI to schedule tweets. Add the following Shadcn components to the project.
npx shadcn-ui@latest add select textareaLet's continue to build our dashboard page by adding components that enable the scheduling functionality. The user can schedule a job to run at a specific time on a particular day or daily. First, let's construct the selector components.
Day selector
Users can choose the day on which the cron job should run. While the default setting is daily, users have the option to modify this and set the job to run only once a week.
import { Select, SelectContent, SelectItem, SelectTrigger, SelectValue } from "@/components/ui/select";

export const DaySelect = () => {
  return (
    <Select name="frequency" defaultValue="daily">
      <SelectTrigger className="w-[140px]">
        <SelectValue placeholder="Frequency" />
      </SelectTrigger>
      <SelectContent>
        <SelectItem value={"daily"}>Every day</SelectItem>
        <SelectItem value={"monday"}>Monday</SelectItem>
        <SelectItem value={"tuesday"}>Tuesday</SelectItem>
        <SelectItem value={"wednesday"}>Wednesday</SelectItem>
        <SelectItem value={"thursday"}>Thursday</SelectItem>
        <SelectItem value={"friday"}>Friday</SelectItem>
        <SelectItem value={"saturday"}>Saturday</SelectItem>
        <SelectItem value={"sunday"}>Sunday</SelectItem>
      </SelectContent>
    </Select>
  );
};
Hour selector
The user can schedule the job at any hour of the given day.
import { Select, SelectContent, SelectItem, SelectTrigger, SelectValue } from "@/components/ui/select";

export const HourSelect = () => {
  return (
    <Select name="hour">
      <SelectTrigger className="w-[100px]">
        <SelectValue placeholder="Hour" />
      </SelectTrigger>
      <SelectContent>
        {[...Array(24)].map((_, index) => (
          <SelectItem key={index} value={index.toString().padStart(2, "0")}>
            {index.toString().padStart(2, "0")}
          </SelectItem>
        ))}
      </SelectContent>
    </Select>
  );
};
Minutes selector
In our example, the user can select every 5th minute to schedule the job.
import { Select, SelectContent, SelectItem, SelectTrigger, SelectValue } from "@/components/ui/select";

export const MinutesSelect = () => {
  return (
    <Select name="minutes">
      <SelectTrigger className="w-[100px]">
        <SelectValue placeholder="Minutes" />
      </SelectTrigger>
      <SelectContent>
        {[...Array(12)].map((_, index) => {
          const min = (index * 5).toString().padStart(2, "0");
          return (
            <SelectItem key={index} value={min}>
              {min}
            </SelectItem>
          );
        })}
      </SelectContent>
    </Select>
  );
};
Dashboard page
With the selectors in place, we can now import these components on the dashboard.
"use client";

import { useFormState } from "react-dom";

import { Button } from "@/components/ui/button";
import { Textarea } from "@/components/ui/textarea";
import { DaySelect, HourSelect, MinutesSelect } from "@/components/schedule";
import { TwitterLogout } from "@/components/twitter";

import { handleScheduleForm } from "./actions";
import { State } from "./schema";

export default function Dashboard() {
  const [state, formAction] = useFormState<State, FormData>(handleScheduleForm, null);

  return (
    <main className="flex min-h-screen flex-col items-start gap-6 p-24">
      <TwitterLogout />
      <form action={formAction} className="flex w-full max-w-5xl flex-col items-start gap-6 font-mono text-sm">
        <p className="fixed left-0 top-0 flex w-full justify-center border-b border-gray-300 bg-gradient-to-b from-zinc-200 pb-6 pt-8 backdrop-blur-2xl dark:border-neutral-800 dark:bg-zinc-800/30 dark:from-inherit lg:static lg:w-auto  lg:rounded-xl lg:border lg:bg-gray-200 lg:p-4 lg:dark:bg-zinc-800/30">
          Schedule new tweets to be posted on Twitter at specific times and days.
        </p>

        <div className="flex gap-4">
          <DaySelect />
          <HourSelect />
          <MinutesSelect />
        </div>
        <Textarea
          name="keywords"
          placeholder="Type the keywords here (use , as the seperator, e.g AI, tech, workflow)."
        />
        <Button type="submit" variant="outline">
          Schedule
        </Button>

        {state && "id" in state && (
          <p>
            Your tweet has been scheduled with ID: <code>{state.id}</code>, (next run: {state.nextRun?.toLocaleString()}
            ).
          </p>
        )}

        {state && "errors" in state && (
          <ul>
            {(state.errors ?? []).map((error) => (
              <li className="text-red-700" key={error.path}>
                {error.message}
              </li>
            ))}
          </ul>
        )}
      </form>
    </main>
  );
}
Here we use a simple form with a server form action. We combine the server action with the client state and use the "use client" directive. How is it possible? useActionState is an experimental feature of React. It allows you to update the state based on the outcome of a form action. This way, you can enjoy the simplicity of server actions while managing your form state client-side on the same component.
Finally, let's define the action that will be triggered when the user clicks on the Schedule button.
Form schema
The Zod schema describes the shape and types of the form. We use zod-form-data to have access to the form types. After the schema validation, we transform the data to a form that our backend can process.
import { z } from "zod";
import { zfd } from "zod-form-data";

export type State =
  | {
      id: string;
      nextRun: Date | null;
    }
  | {
      message: string;
      errors?: Array<{
        path: string;
        message: string;
      }>;
    }
  | null;

export const formSchema = zfd
  .formData({
    hour: zfd.text(z.string({ message: "Please select an hour value for the schedule!" }).min(2).max(2)),
    minutes: zfd.text(z.string({ message: "Please select a minutes value for the schedule!" }).min(2).max(2)),
    frequency: zfd.text(
      z.enum(["daily", "monday", "tuesday", "wednesday", "thursday", "friday", "saturday", "sunday"], {
        message: "Please select a frequency for the schedule!",
      })
    ),
    keywords: zfd.text(z.string({ message: "Please add keywords!" }).regex(/^[a-zA-Z0-9, ]+$/)),
  })
  .transform((data) => ({
    time: `${data.hour}:${data.minutes}`,
    frequency: data.frequency,
    keywords: data.keywords.split(","),
  }));
Form server action
When a Server Action is defined, Next.js automatically creates a reference to the server function and passes it to the Client Component. When this function is called on the client, React sends a request to the server to execute the function and returns the result.
"use server";

import { z, ZodError } from "zod";

import { scheduleTweet } from "@/lib/schedule";

import { formSchema, State } from "./schema";

export const handleScheduleForm = async (_: State | null, formData: z.input<typeof formSchema>): Promise<State> => {
  try {
    const data = formSchema.parse(formData);

    const schedule = await scheduleTweet({
      time: data.time,
      frequency: data.frequency,
      keywords: data.keywords,
    });

    return { id: schedule.id, nextRun: schedule.nextRun };
  } catch (error) {
    if (error instanceof ZodError) {
      return {
        message: "Invalid form data",
        errors: error.issues.map((issue) => ({
          path: issue.path.join("."),
          message: `${issue.message}`,
        })),
      };
    }
    return {
      message: "Something went wrong. Please try again.",
      errors: [{ path: "unknown", message: (error as Error).message }],
    };
  }
};
We now have the first working version of the app. You can log in with the X account and schedule new tweets. Currently, the tweet message is what you input in the keywords text area, as the message generation feature isn't functional yet. The next step is to integrate OpenAI for message generation.
Generating tweet message with OpenAI
Account setup
OpenAI is a company specializing in AI research and deployment. It offers a user-friendly API and official SDK libraries for easy integration. In this tutorial, we'll be using the official TypeScript library.
npm install openaiTo use the OpenAI API with Trigger.dev, you’ll need an API Key from OpenAI. If you don’t have one yet, you can obtain it from the OpenAI dashboard.

Save the generated key to the .env.local file
# .env.local

...
OPENAI_API_KEY=
OpenAI library
Now that we have the OpenAI account, the next step is to create a library file for the OpenAI functionalities. Currently, we have a single function that generates tweets based on keywords and previous tweets. We use OpenAI's chat completion API with the gpt-3.5-turbo model. Additionally, we initialize the completion model with system and user messages to maintain context.
import OpenAI from "openai";

const openai = new OpenAI({
  apiKey: process.env.OPENAI_API_KEY!,
});

/**
 * Generates a new tweet based on the given keywords and previous tweets.
 * Adds the hashtag #WrittenbyAI at the end of the generated tweet.
 * Generates the text without double quotes ("") in it.
 *
 * @param keywords - An array of keywords to base the tweet on.
 * @param previousTweets - An array of previous tweets in the topic.
 * @returns A promise that resolves to a ChatCompletion object representing the generated tweet.
 */
export const generateTweet = async (
  keywords: string[],
  previousTweets: string[]
): Promise<OpenAI.Chat.Completions.ChatCompletion> => {
  const previousTweetMessages = previousTweets.map((tweet, index) => ({
    role: "user" as const,
    content: `Previous tweet in the topic: ${tweet}`,
    name: `previous-tweet-${index}`,
  }));

  return openai.chat.completions.create({
    model: "gpt-3.5-turbo",
    messages: [
      {
        role: "system",
        content: "You are a helpful and creative social media assistant.",
      },
      ...previousTweetMessages,
      {
        role: "user",
        content: `Based on the keywords: ${keywords.join(",")}${
          previousTweetMessages.length > 0 ? " and the previous tweets above in this topic" : ""
        }, generate a new tweet. Add the hashtag #WrittenbyAI at the end. Generate the text wihtout " in it.`,
      },
    ],
  });
};
Generating tweets in a scheduled task
Next, let’s extend the scheduled task with the tweet text generation.
...
// Generate a tweet based on the keywords
const openAIResponse = await openAI.generateTweet(
  keywords,
  (tweetHistoryList ?? []).map((tweet) => tweet.text)
);

logger.info(`OpenAI response: ${JSON.stringify(openAIResponse)}`);

const tweetText = openAIResponse.choices[0].message.content;

if (!tweetText) {
  throw new Error("Failed to generate tweet text");
}
...
Now the project is ready to schedule, generate, and publish tweets to the X platform.
Excited to share a new blog post covering an app tutorial on Next.js and TriggerDev v3 integration with X API and OpenAI. Check it out on my blog in my bio for the latest insights and innovations. Embrace the future of tech and AI! 🚀 #WrittenbyAI
— Marton Dobos (@marton_dobos) June 8, 2024
Final thoughts
The article outlines how to build asynchronous workflows with Next.js, trigger.dev v3, X API, and OpenAI. It discusses creating a task scheduler for tweets, handling authentication tokens, and validating schedules. It also explains how to store tokens in Redis, schedule tweets, and handle errors. The document further details how to build a user interface for scheduling tweets, including creating selectors for days, hours, and minutes. It also covers integrating OpenAI for generating tweet messages based on keywords and previous tweets.